

vastai cloud copy. It’s available on Docker-based instances only (not VM/KVM instances).
Cloud services are connected on the Settings page under Cloud Connections.
Google Drive
Prerequisites: A Google Drive account — ideally one dedicated to Vast, since Vast connects at the account level.- Navigate to the Settings page and, under Cloud Connections, select Connect to Google Drive.
- Enter a name for your integration with Google Drive.
- Submit the name, after which a new tab should open up asking if you would like to give Vast access to your Google Drive.
- Once the verification prompt has been accepted, you will be redirected back to vast with your Google Drive fully integrated.
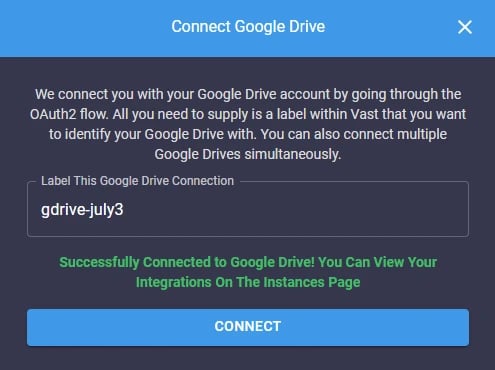
Gdrive
Amazon S3
Prerequisites: An active Amazon Web Services (AWS) account. Vast connects at the IAM-user level, so create a new IAM user scoped to the data you want to sync rather than reusing an existing one.- Create a S3 Bucket in AWS
- Create an IAM User and Grant Access to the S3 Bucket, we recommend you create a user with access to your specific bucket for this process rather than full access.
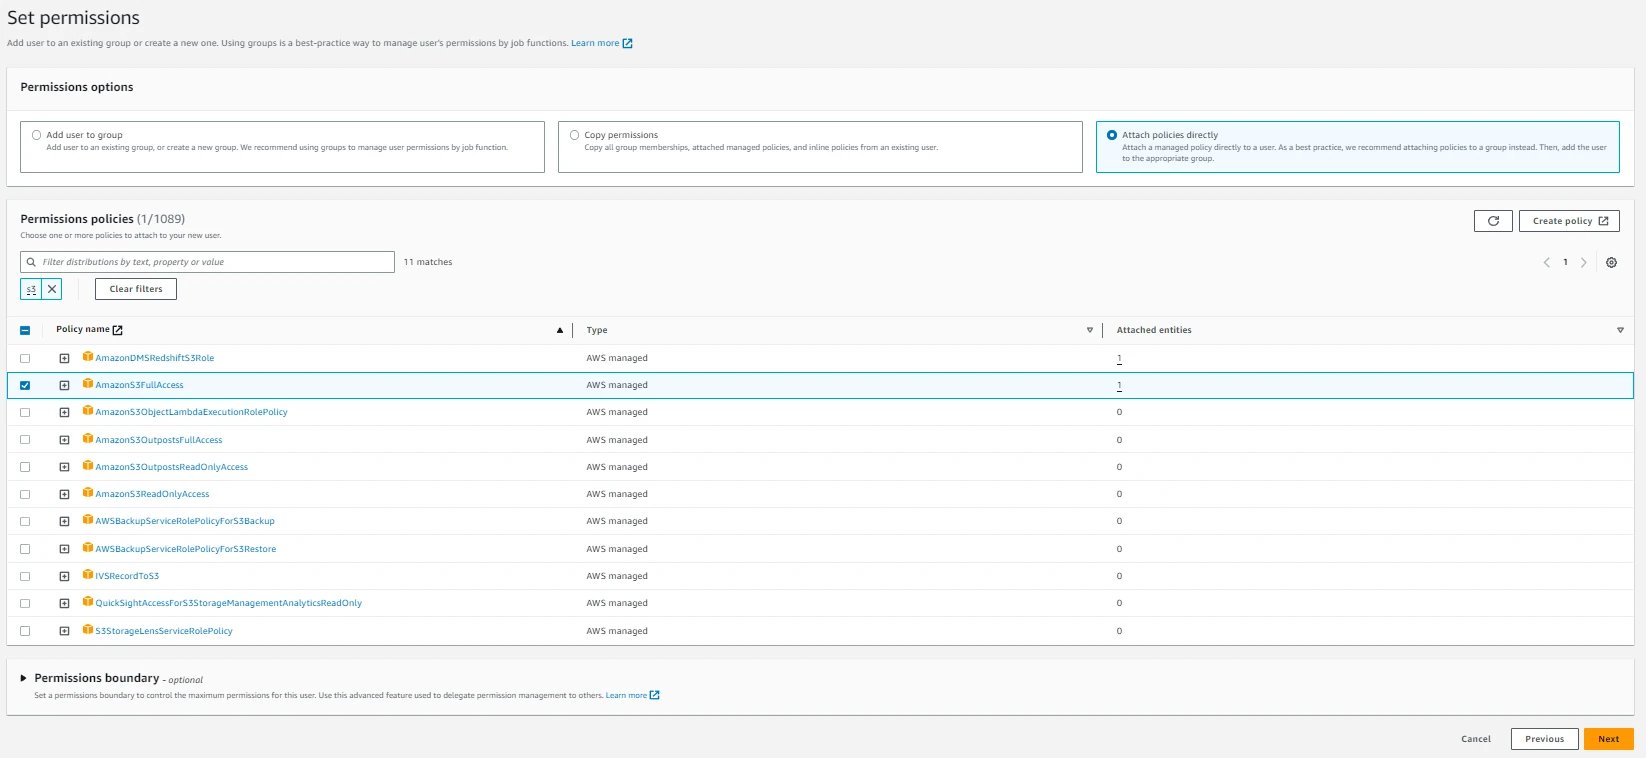
Awss3
- Once the user is created, click the user and go Security credentials.
- Click Create access key, and enable for Command Line interface
- Once the access key is created, you will be prompted with an Access Key, and a Secret access Key. This will be the information required to use your AWS user permissions on Vast.
- Navigate to the Settings page and, under Cloud Connections, select Connect to Amazon S3.
- Enter your credentials in the given fields, as well as a name for your integration with Amazon.
Backblaze
Any bucket your application key can access is reachable from Vast, so create a new application key scoped to the bucket you want to sync.- Create a bucket in Backblaze. It should not matter if the bucket is private or public.
- Go to Application Keys
- Select Add a New Application Key
- Grant access for Read and Write operations on the bucket of your choice
- Note the keyId and the applicationKey that are returned to you. This is the data required for Vast.
- Navigate to the Settings page and, under Cloud Connections, select Connect to Backblaze.
- Enter your credentials in the given fields, as well as a name for your integration with Backblaze.
Dropbox
Prerequisites: A Dropbox account — ideally one dedicated to Vast, since Vast connects at the account level.- Navigate to the Settings page and, under Cloud Connections, select Connect to Dropbox.
- Enter a name for your integration with Dropbox.
- Submit the name, after which a new tab should open up asking if you would like to give Vast access to your Dropbox.
- Once the verification prompt has been accepted, you will be redirected back to vast with dropbox fully integrated.
Hugging Face
Prerequisites: A Hugging Face account. Vast connects to Hugging Face through its S3-compatible Storage Buckets: generate S3 credentials on Hugging Face, then add them to Vast. The credentials inherit the permissions of the token they were generated from — they can reach every Storage Bucket in every namespace (user and organizations) that token can access, though other repository types (models, datasets, Spaces) are not exposed. For sensitive use cases, generate the credentials from a fine-grained token scoped to only the buckets you intend to sync.- Navigate to your Hugging Face Access Tokens page and select Create new token.
-
Under Token type, select Write, name the token, and select Create token.
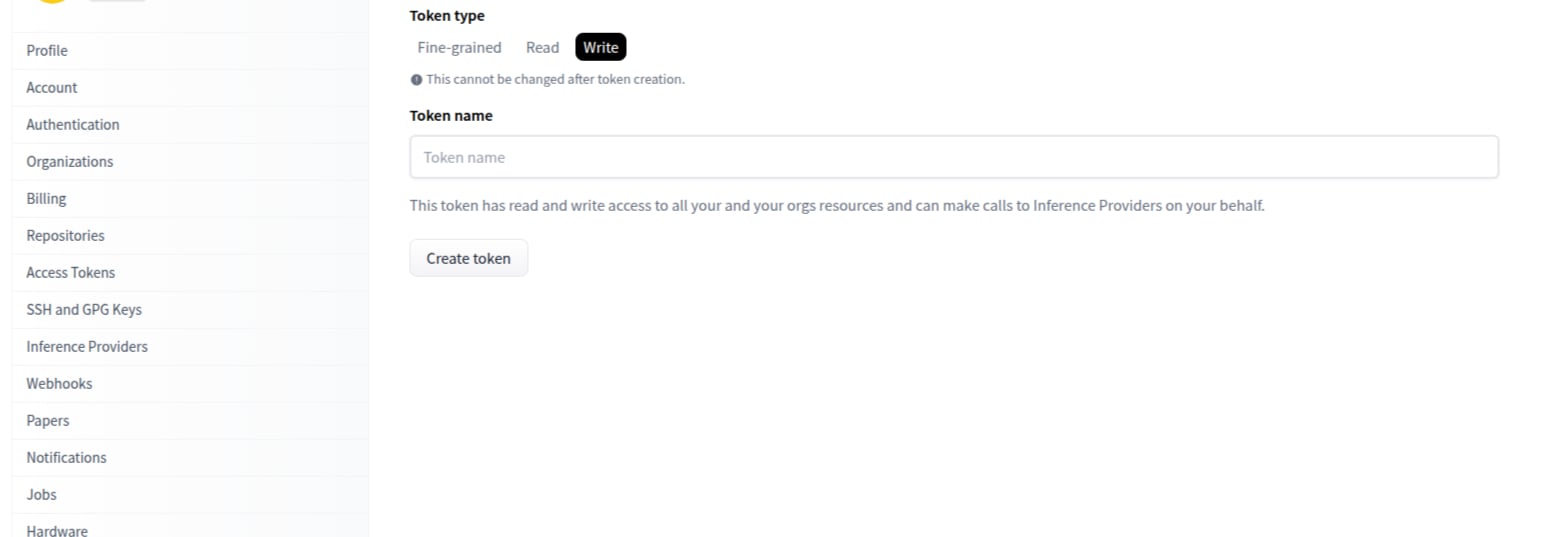
Select the Write token type
-
Back on the token list, open the three-dot menu at the far right of your token and select Generate S3 credentials.
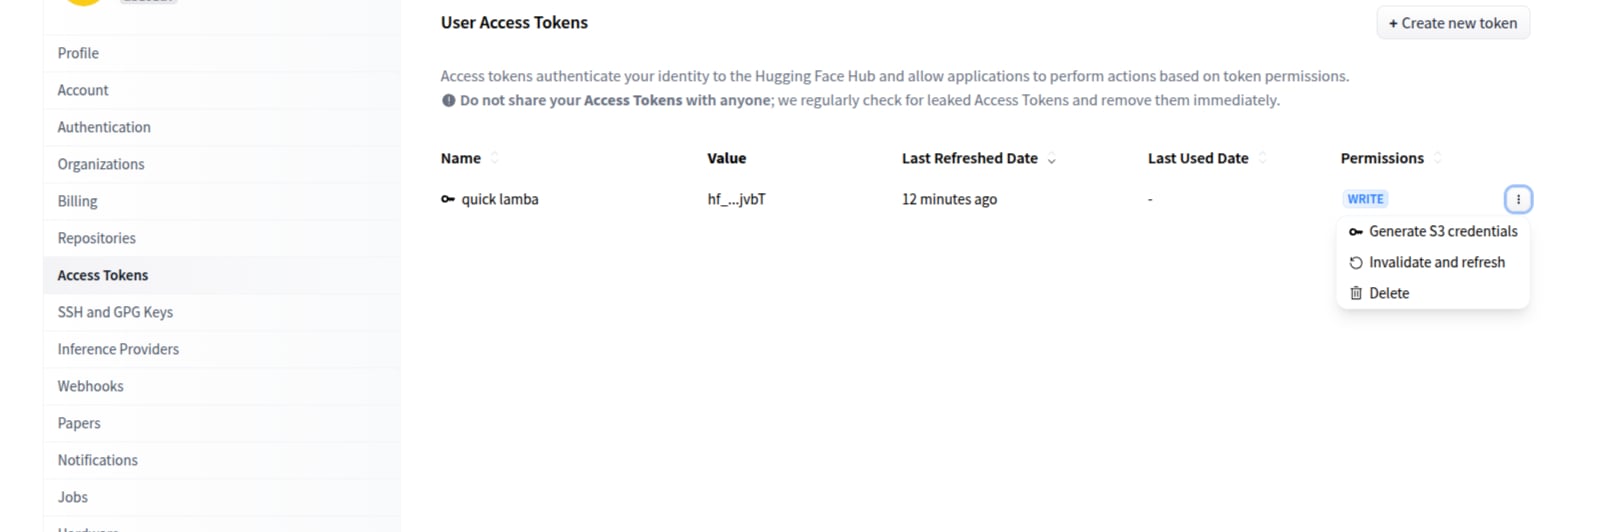
Generate S3 credentials
-
Copy the Access Key ID (it begins with
HFAK) and the Secret Access Key. The secret is shown only once. Your namespace is the last segment of the Endpoint URL (https://s3.hf.co/<namespace>).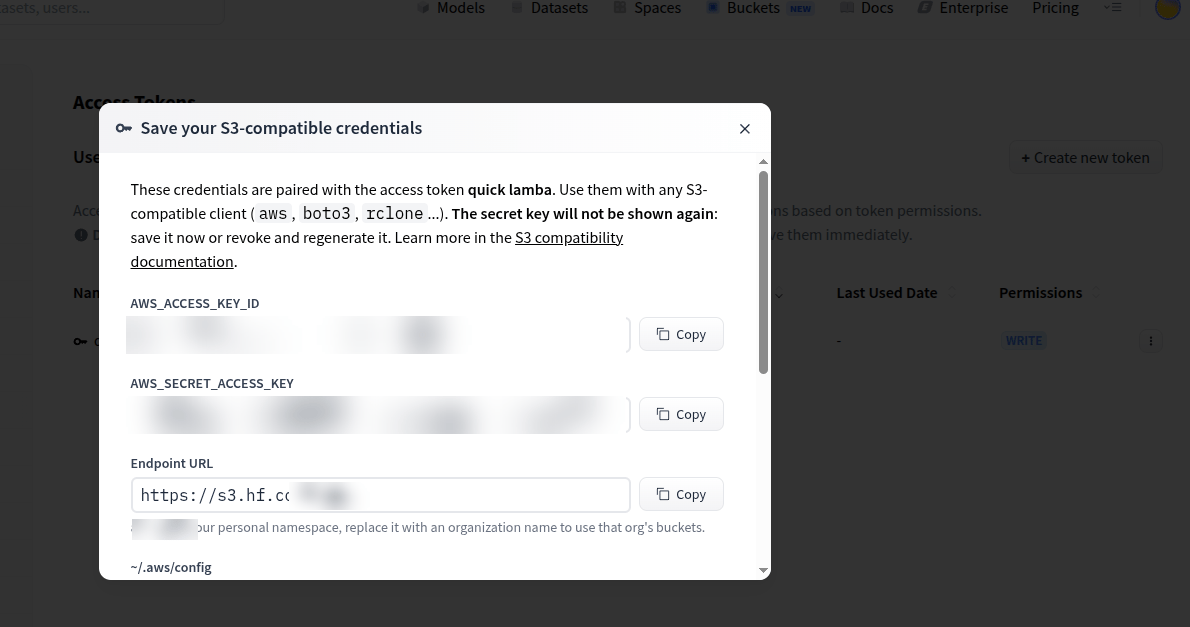
Save your S3-compatible credentials
- Create a bucket on your Hugging Face account — this is the bucket you’ll point your Vast instance at later in the Cloud Copy UI on the Instances page.
- Navigate to the Vast Settings page and, under Cloud Connections, select Connect Hugging Face.
-
Enter a name for the connection, your Hugging Face namespace (your username or organization), and the Access Key ID and Secret Access Key from step 4.
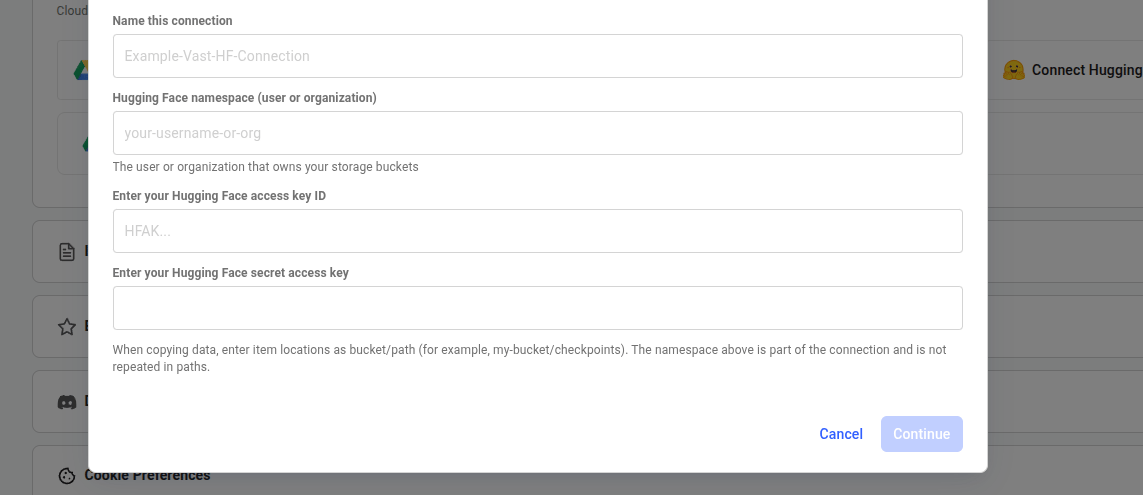
Connect Hugging Face on Vast
my-bucket) and the path within it (for example, checkpoints) in their separate fields in the Cloud Copy UI. The namespace is part of the connection and is not repeated in either field.