By default, API keys have full access to your account. For shared tooling, CI/CD, or automation, create a scoped key with only the permissions that workload needs. See Scope a key below.
Create an API key
- Sign in to the Vast.ai console and open the Keys page.
-
Find the API Keys section and click +New.
-
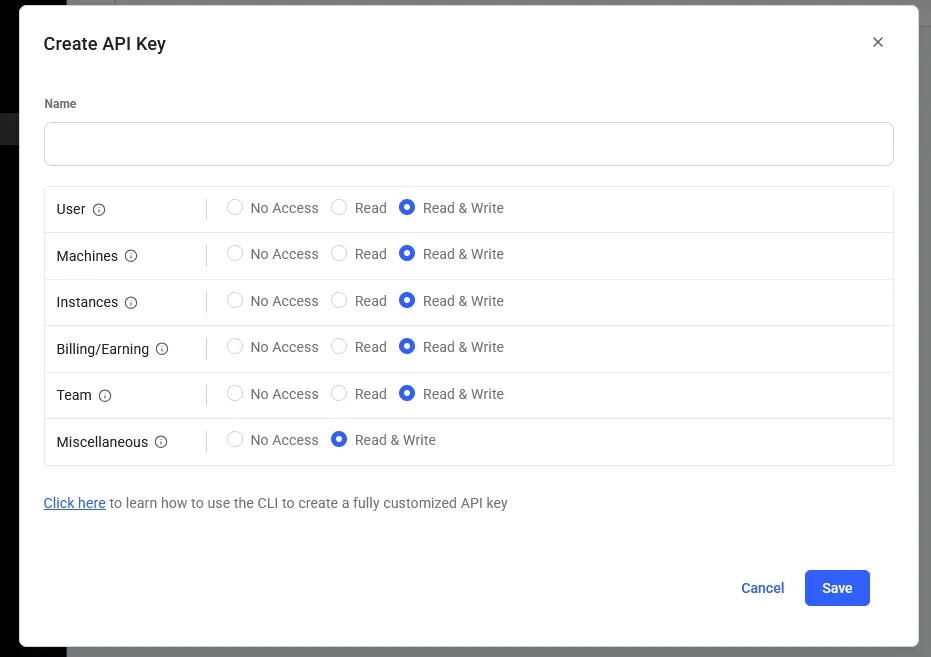
Give the key a descriptive name (e.g.
ci-deploy,local-dev,prod-scaler). The name only helps you identify keys later; it isn’t sent in requests. -
Select the permissions for this key. Defaults to full access; restrict for scoped keys (see below).

- Click Create. The new key is shown once. Copy it now.
Use your key
Once you’ve copied the key, choose how to authenticate based on which surface you’re using.- CLI
- SDK
- REST API
Configure the CLI once; subsequent commands pick the key up automatically:The key is stored at
~/.config/vastai/vast_api_key. Override per-command with the --api-key flag if needed.Scope a key
Default keys have full access to your account, including billing, instance creation, and key management. For automation that only needs a subset of those, create a scoped key. Scoped keys are configured at creation time in the console (step 4 above) or via the CLI:
See the permissions reference for the full list of permission flags and their effects.
Reset a key
If a key is compromised, lost, or you want to rotate it on a schedule:- Go to the Keys page.
- Find the key in the API Keys section and click Reset.
- A new value is generated and shown once. Copy it.
- Update wherever the old value was stored (env vars, secret managers, CI variables).
Delete a key
To permanently revoke a key:- Go to the Keys page.
- Find the key in the API Keys section and click Delete.
401 Unauthorized responses.
CLI reference
If you’d rather manage keys from the command line:Security tips
- Never commit keys to source control. Use environment variables, GitHub Actions secrets, or a secret manager.
- Use a separate key per environment. Local dev, staging, and prod should each have their own key so you can revoke one without affecting the others.
- Scope keys to the minimum permissions they need. A leaked scoped key is much less damaging than a leaked full-access key.
- Rotate keys periodically. A 90-day rotation is a reasonable baseline for production keys.
- Audit your keys. Review the API Keys section of the console occasionally and delete any keys you no longer use or recognize.
Related
- SSH keys, used to connect to instances (separate from API keys).
- CLI authentication, how the CLI uses your API key.
- API authentication & permissions, the deep-dive on auth.