Introduction
Creating a template is simple - it’s just telling Vast.ai how you want your instances to be configured. This guide will walk you through creating your first template step by step.Prerequisites
- A Vast.ai account
- SSH client installed on your local machine and SSH public key added in the SSH Keys tab in the Keys section of your console
- (Optional) Install and use vast-cli
Ways to Create Templates
You have three options:1. Edit an Existing Template (Recommended for Beginners)
Start with one of our recommended templates and customize it to your needs. This is the easiest way to get started. Best for: First-time users, quick customization of existing setups2. Create from Scratch
Click ”+ New” on the templates page for a blank template and configure everything yourself. Best for: Users who know exactly what they need3. Use an Existing Docker Image
Find a Docker image on DockerHub or another registry and create a template around it. Best for: Users with a specific application in mind (e.g., nginx, postgres, a specific ML framework)Tutorial: Create Your First Template
Let’s create a simple template together. We’ll edit the NVIDIA CUDA template from the Quick Start guide.Step 1: Open the Template Editor
- Go to cloud.vast.ai/templates
- Find the “NVIDIA CUDA” template (or any recommended template)
- Click the pencil icon to edit
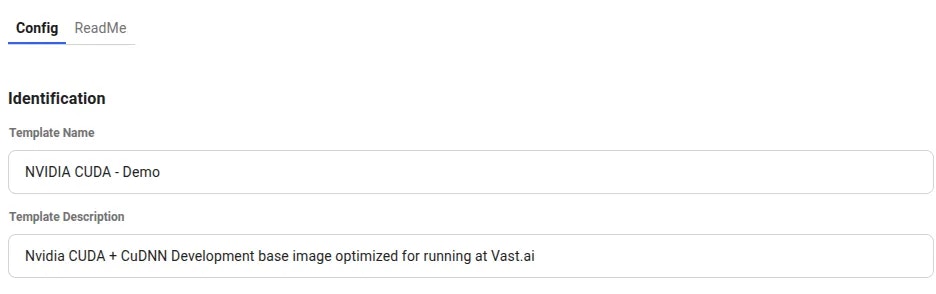
Config and ReadMe. Stay on the Config tab.
Step 2: Give Your Template a Name
In the Identification section:- Change the Template Name to something descriptive (e.g., “My First Template”)
- Add a Template Description if you’d like (optional)
Step 3: Choose Your Docker Image
In the Docker Repository And Environment section, you’ll see the Image Path:Tag field. You can use:- Any public Docker image (e.g.,
nginx:latest,postgres:14,python:3.11) - Vast.ai base images (e.g.,
vastai/base-image,vastai/pytorch) - Your own custom images from any registry
nginx:latest for a simple web server.
For a complete explanation of all Docker settings, see our Template Settings guide.
Step 4: Add Ports (Optional)
If your application needs external access, add ports in the Ports section. For example, if you’re running nginx, add port80.
Step 5: Set Environment Variables (Optional)
If your Docker image requires environment variables, add them in the Environment Variables section.Step 6: Choose a Launch Mode
Select how you want to access your instance:- Jupyter + SSH - Best for interactive development (default for most use cases)
- SSH only - If you don’t need Jupyter
- docker ENTRYPOINT - If you want the container to run exactly as designed
For detailed information about launch modes, see our Template Settings guide.
Step 7: Save Your Template
Scroll to the bottom and click one of the save buttons:- Create - Saves the template to “My Templates” for later use
- Create & Use - Saves and immediately takes you to the offers page to rent an instance

Next Steps
Now that you know the basics, you can:Explore All Template Options
See our Template Settings for complete documentation of every field in the template editor.Add Advanced Customization
Learn about runtime customization and building custom Docker images in our Advanced Setup guide:- PROVISIONING_SCRIPT - Run setup scripts when instances start
- PORTAL_CONFIG - Configure the Instance Portal
- Base Images - Build custom Docker images with Vast.ai security features
- VM Templates - When to use virtual machines instead of containers
Manage Your Templates
Learn how to update, share, and troubleshoot templates in our Managing Templates guide.See Real Examples
Check out our GROBID example to see a complete template creation workflow for a real application.Common Use Cases
I want to run a specific application (e.g., nginx, postgres)
- Find the official Docker image on DockerHub
- Create a template with that image path
- Add required ports and environment variables
- Save and launch
I want to customize a Vast recommended template
- Edit one of our recommended templates
- Add a PROVISIONING_SCRIPT environment variable pointing to your setup script
- See Advanced Setup for details
I want to build my own custom Docker image
- Create a Dockerfile (optionally FROM a Vast base image)
- Build and push to a container registry
- Create a template with your custom image path
- See Advanced Setup for details