Jupyter is an interactive notebook interface that is very popular for AI/ML development using Python. Using Jupyter, you can connect to an interface in your browser and open any notebook that you can download as a .ipynb file.
We recommend this launch mode to start. We also recommend this launch mode over trying to run Google Colab with Vast. While Google Colab has a way to connect to a “local runtime”, running Jupyter directly is more robust and less error prone if connections drop or the browser window is closed.
By default Jupyter instances use a proxy server. This is a simple setup that works on machines with or without open ports. The only downside is it can be slower to upload/download large files.
Jupyter direct HTTPS launch mode
When selecting Jupyter there is a check box for “Jupyter direct HTTPS”. This preferred option will establish a direct connection to the instance which is faster for uploading and downloading files from your local machine. Selecting this option will automatically filter out machines that do not have open ports, as they cannot establish a direct connection.
Jupyter uses a browser interface, so to get the direct HTTPS connection to work, you will need to install a certificate onto your operating system.
WARNING
If you don’t install the browser certificate, Windows and Linux will show a “Your connection is not private” Privacy error. It is annoying but you can click through by clicking “Advanced” and then proceed.
Installing the TLS certificate
Start by downloading the certificate here. Then follow the directions for your operating system.
In most operating systems, double clicking on the certificate will start an installation wizard. You can also access the correct settings by clicking on the appropriate security settings in your browser.
Chrome on Windows
- Open your Chrome security settings by clicking on the three dot menu in the upper right. Then click Settings. Then click Privacy and security on the left hand navigation. From that menu, select Security.
- Click on “Manage device certificates”
- Click Next and then click Import and find the downloaded jvastai_root.cer file.
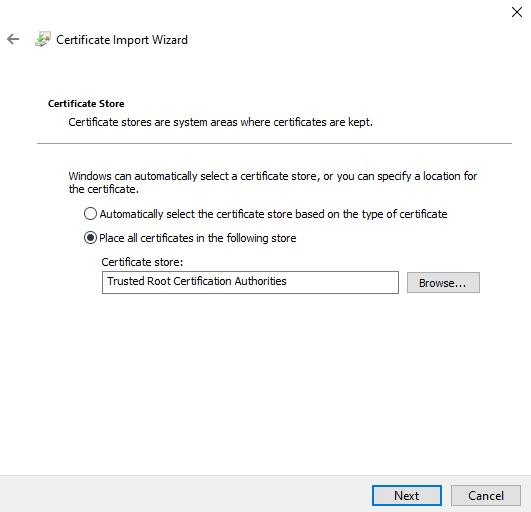
- Click “Place all certificates in the following store” and then use the browse button. Click on the Trusted Root Certification Authorities folder.
- Click finish and agree to finalize the import. No reboot is necessary and all new instances created will then not have the warning pop-up.
Note that existing instances will still have the warning.
Chrome on Linux
- Open your Chrome security settings by clicking on the three dot menu in the upper right. Then click Settings. Then click Privacy and security on the left hand navigation. From that menu, select Security (safe browsing).
- Scroll down and select “Manage Certificates” on that page.
- Select the ‘Authorities’ tab under ‘Manage certificates’.
- Press the import button and import the downloaded jvastai_root.cer file. You may need to select show all file types.
Windows - General
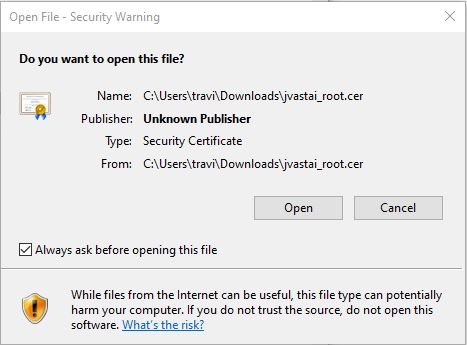
- After downloading the certificate, double click on it to open the installation wizard.
- Click “Open”.
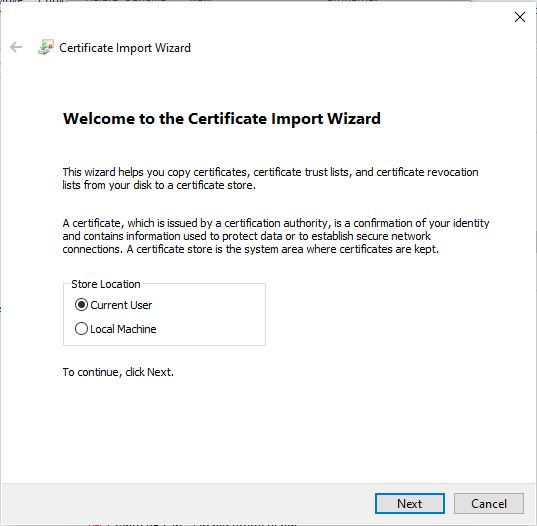
- Click on the “Install Certificate” button. Select either the current user or local machine and hit next.
- Click “Place all certificates in the following store”.
- Click Browse and select the folder “Trusted Root Certification Authorities”. Click OK. Then click Next. Click “Finish” to install the certificate.
- Reboot the machine so the change can take effect.
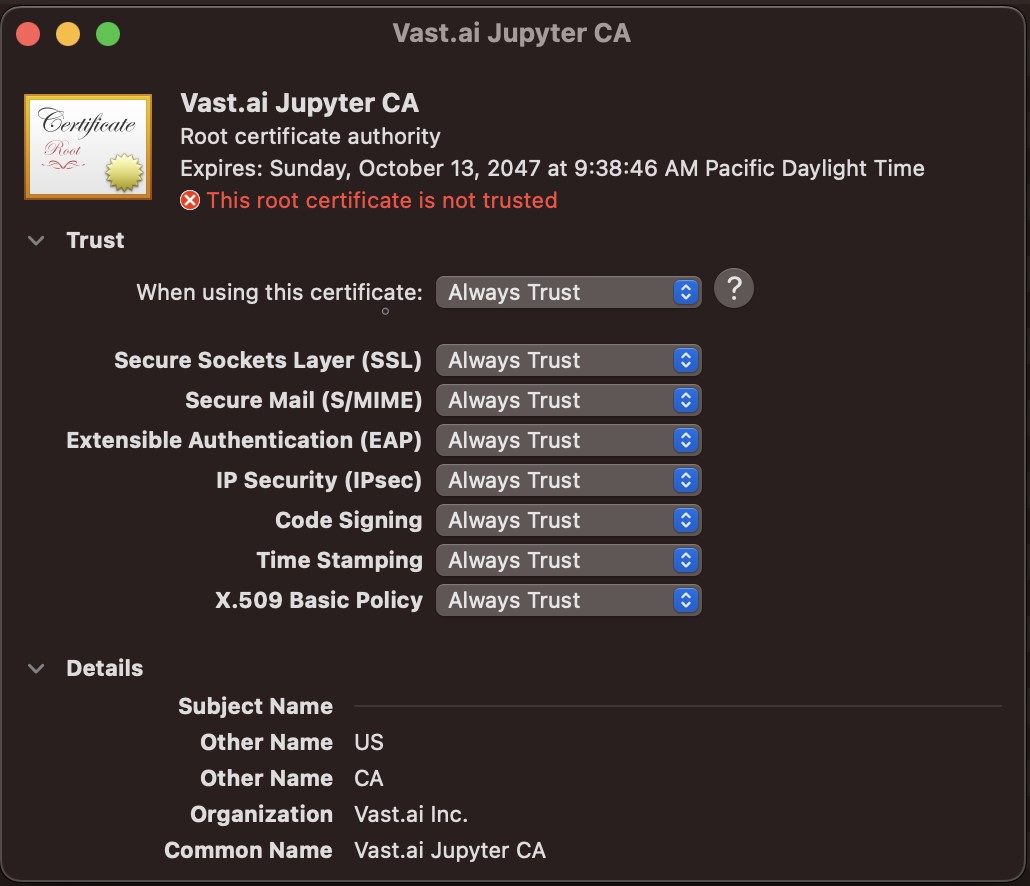
macOS
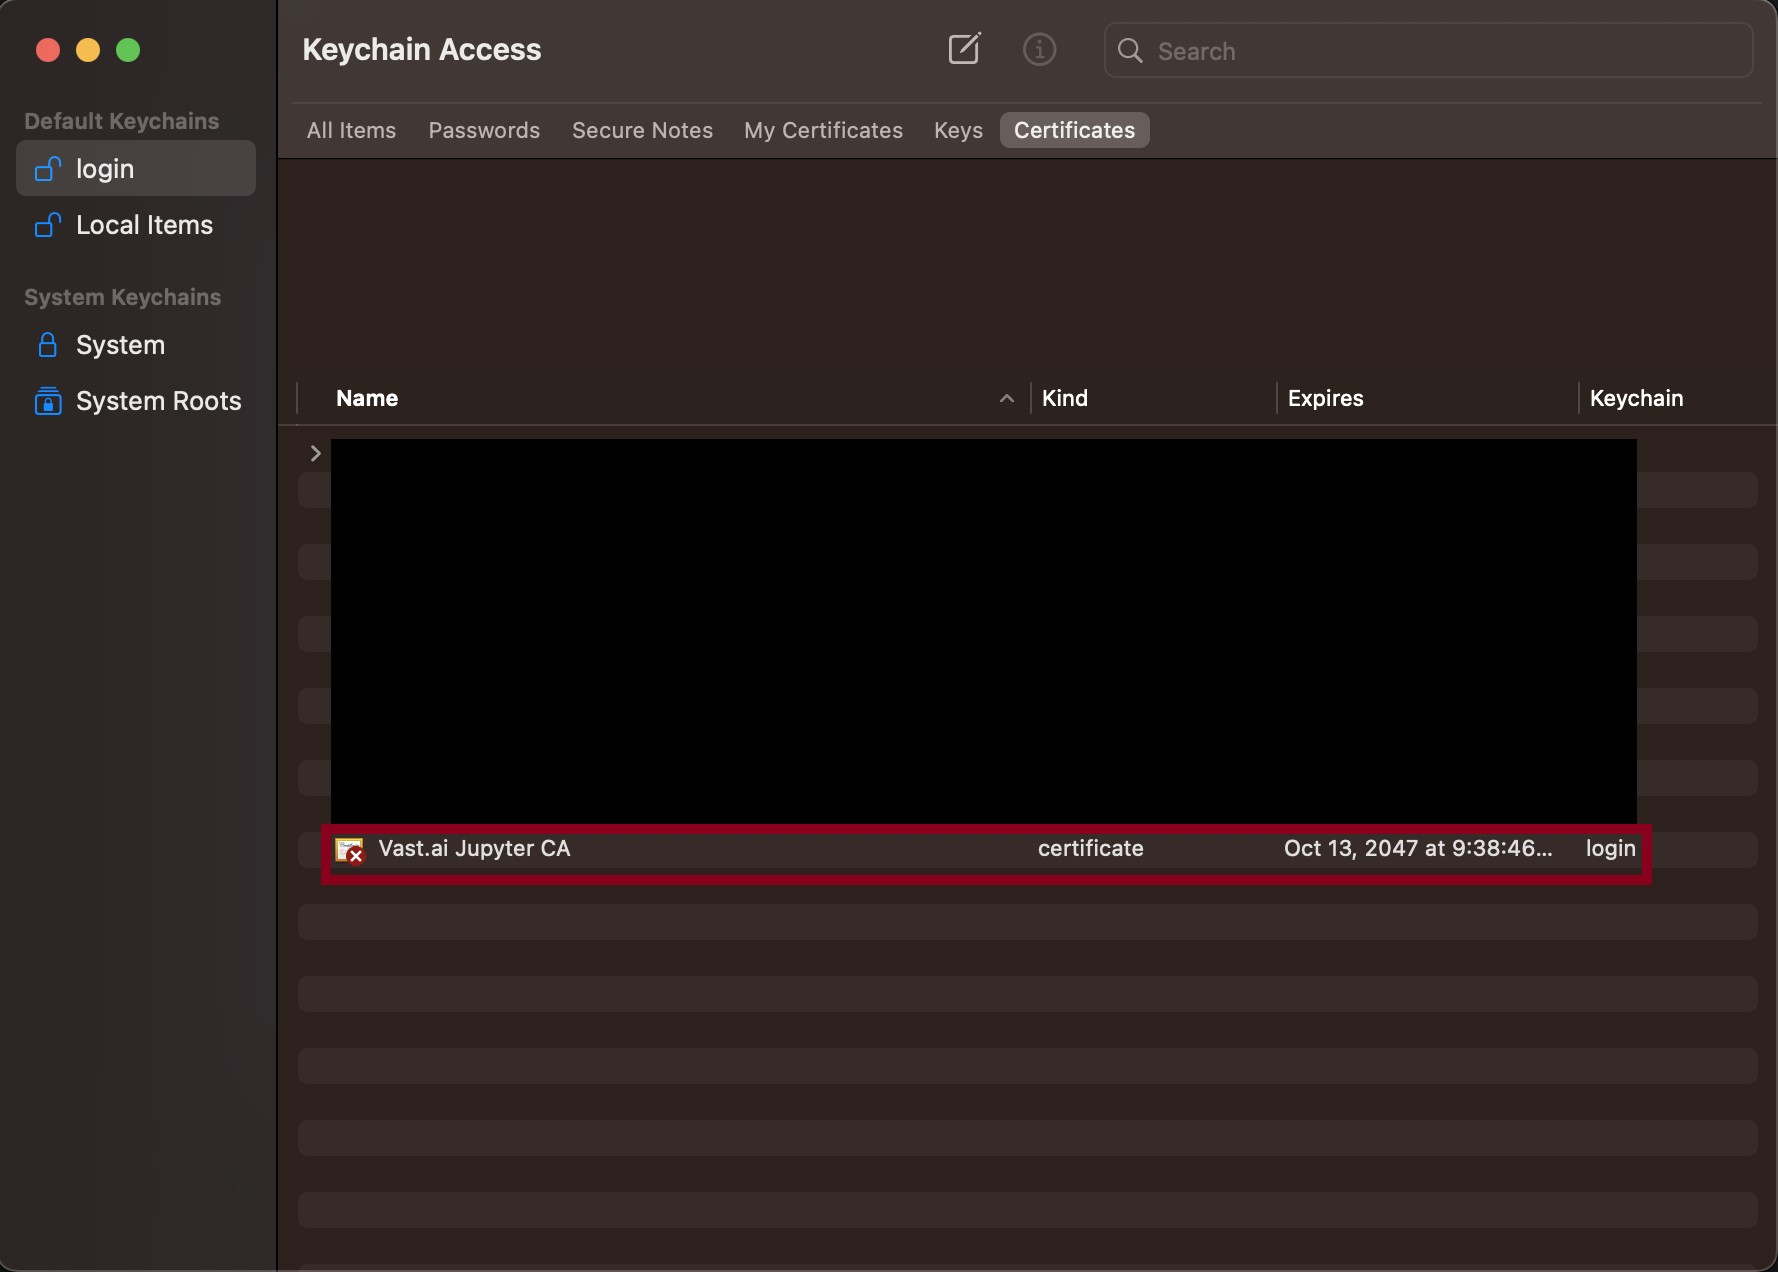
- Double click the certificate after downloading it. It will then be added to your Keychain under the Login default keychain. Make sure that the Keychain Access application is opened and that there is an entry for Vast.ai Jupyter in the list of certificates. If it does not appear, then use the import button to manually import the certificate so that it appears in your list of certificates.
- Double click the entry and then click on the “Trust” box.
- Change the “When using this certificate” box to “Always Trust”.
- Close the window. The change should take effect immediately for all instances you have running and create in the future.