How Reserved Instances Work
You can convert an on-demand instance into a reserved instance with a lower hourly rate by pre-paying. Key points:- Convert any on-demand instance to reserved pricing
- Discounts up to 50% based on commitment length
- Pre-paid credits are locked to that specific instance
- Cannot migrate between hosts
Creating a Reserved Instance
- Web UI
- CLI
Step 1, Rent the Instance
- Go to Search page.
- Find a GPU that meets your requirements, click the Rent button.
- This creates an on-demand instance.
- Go to the Instances page.
-
On your instance card, find the green discount badge.
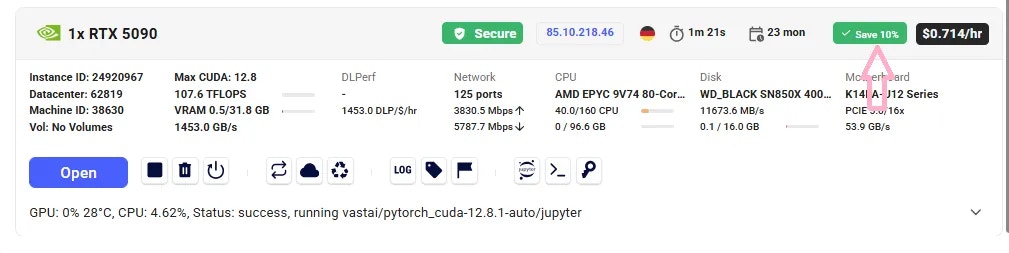
Save badge
-
Click the badge, a new window will open with the available pre-paid periods (e.g., 1 month, 3 months, 6 months).
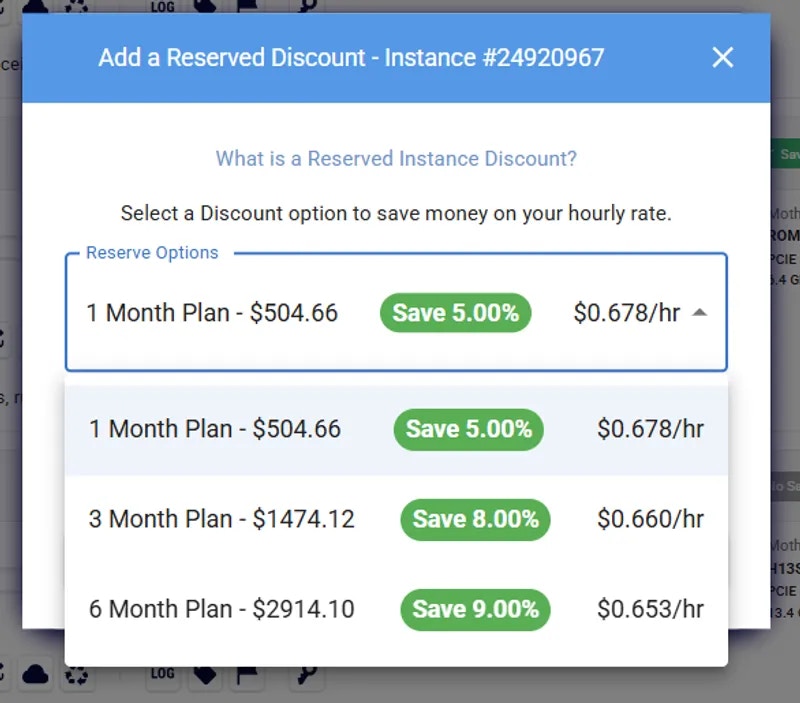
Add Reserved Discount
- Select your preferred period and confirm. The system calculates deposit and discount automatically.
Important Considerations
- If you later change your mind, you can withdrawal only any fraction of the funds that remain after paying the difference between the on demand and discounted price over the current duration.
- If the machine fails the implicit or explicit Service Level Agreement and is deverified the full balance can be withdrawn without penalty.
- Reserved instances cannot migrate between different hosts.
Extending a Reserved Instance
You can extend your reservation at any time:- Web UI
- CLI
Same flow as above - via Save badge on instance card.
Refunds
You can cancel (destroy) a reserved / prepaid instance to get part of your deposit back. When you reserve a machine, you get a discounted rate upfront. If you cancel early, we claw back the discount you already received, plus a 5% fee. Example:- On-demand: $1/hr → $720/month
- Reserved (1 month): $576/month
- Cancel immediately → Refund = $576
- Cancel after 15 days → Remaining = $288 → Refund = ~$212 (after discount clawback + 5% fee)
- Cancel at the end → Refund = $0
Preview Reserved Pricing Before Renting
You can check the reserved price before committing:- Go to the Search page.
-
Switch the On-demand filter to the Reserved filter.
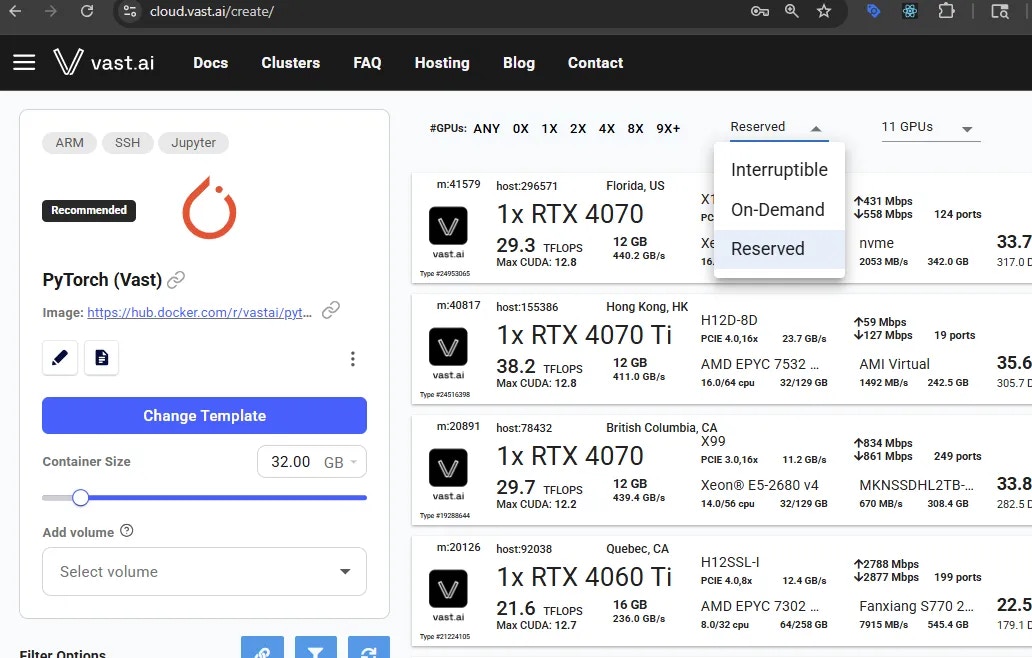
Reserved Filter
- Set the duration filter (e.g., 1 month), if needed.
-
Hover over the Rent button, you’ll see a breakdown, including a Reserved cost section.
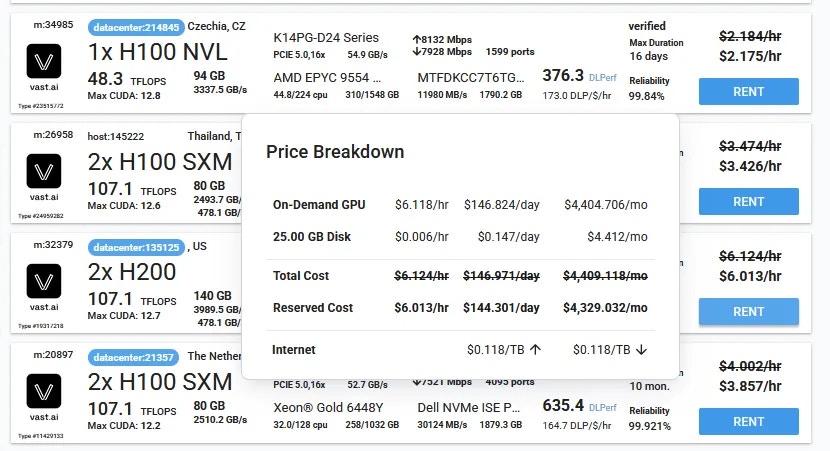
Price Breakdown
- If you like the price, click Rent and follow the steps to convert it to a reserved instance.
Common Questions
Can I switch an existing on-demand instance to reserved?
Yes, if there is an available discount. Go to the Instances page, click the discount badge on your instance card, choose a period, and confirm.Can I extend a reserved instance?
Yes, you can extend it anytime via the same discount badge in the Instances page, as long as the instance still has an active discount period. You can use the CLI for custom amounts.What happens if I cancel / delete a reserved instance early?
You’ll receive a partial refund of your unused pre-paid balance, minus the total discount received so far plus a 5% fee. The refund amount will be displayed in the delete instance modal and will also appear on the Billing page after you delete the instance.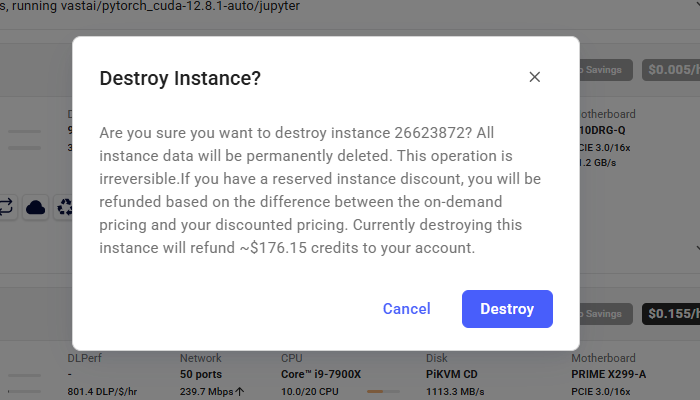
What happens if I stop a reserved instance?
If you stop the instance, the GPU will be released like any other instance and may be rented by another user.Next Steps
- Learn about other rental types
- Understand billing basics
- View your current instances