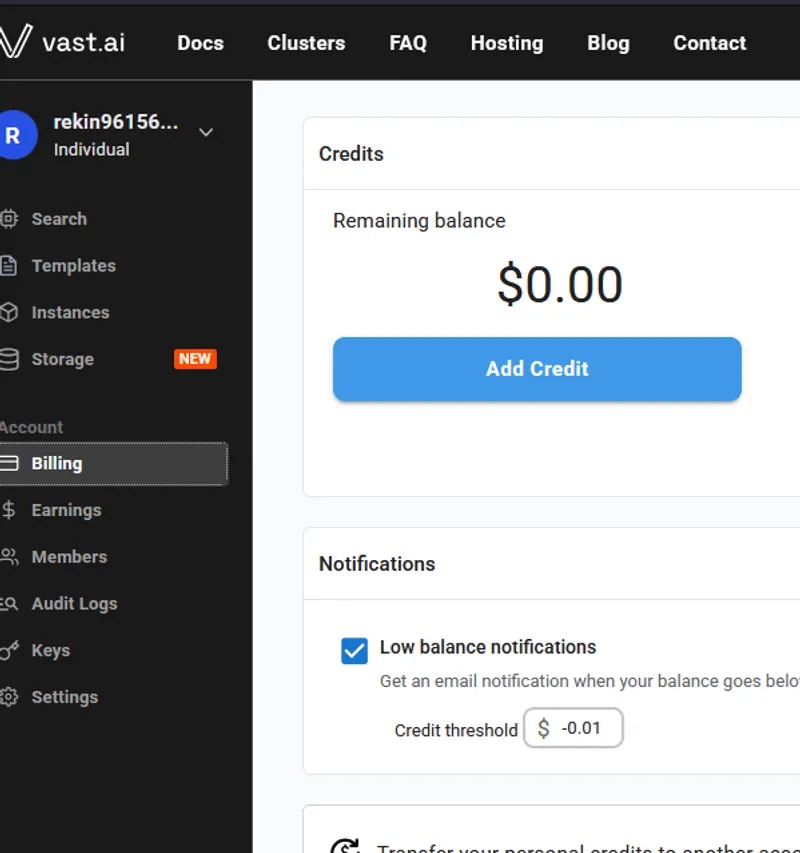
1. Sign Up & Add Credit
- Create an account on vast.ai.
- Verify your email address.
- Go to Billing → Add Credit and top up using credit card, BitPay, or Crypto.com.
-
Learn about autobilling to avoid interruptions.
-
Your balance appears at the top right of the dashboard.

Before you can rent a machine or create a team, you must verify your email address. After signing up, check your inbox (and spam folder) for the verification email and click the link inside. You can resend the verification email anytime from Settings → Resend Verification Email. Learn more about teams and instance management.
2. Prepare to Connect
-
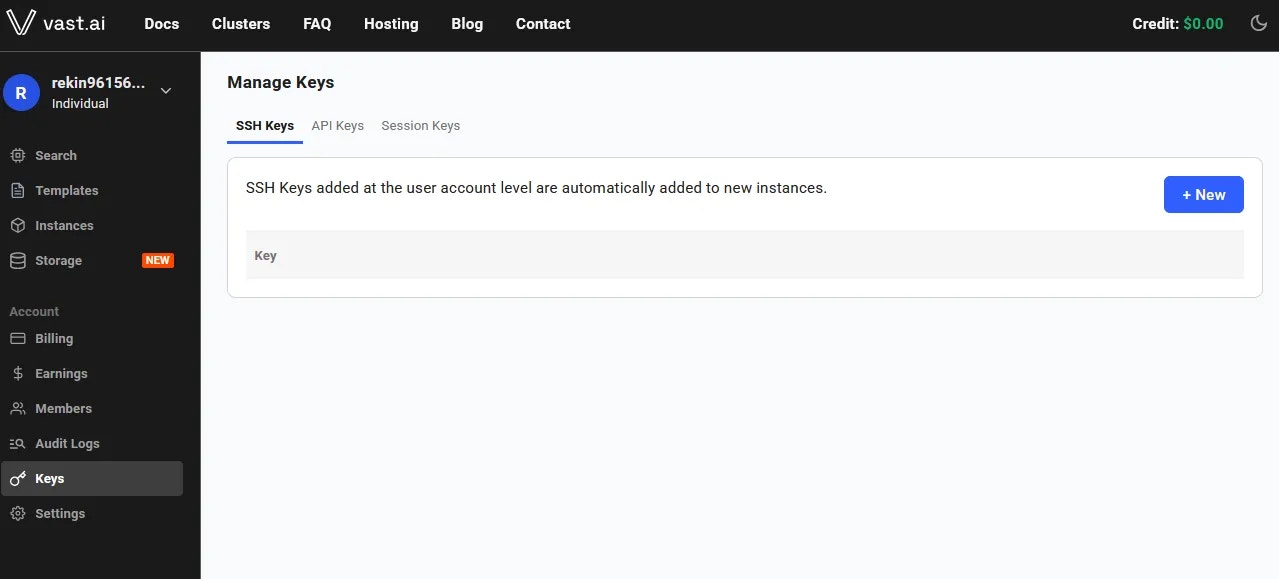
For SSH access: generate an SSH key pair following our complete SSH guide and upload your public key in Keys page or via account settings.
- For Jupyter access: download and install the provided TSL certificate following our Jupyter setup guide (needed for secure browser access).
If you don’t install the provided browser certificate:
- Windows / Linux - You’ll see a “Your connection is not private” privacy warning. You can still connect by clicking Advanced → Proceed, but the warning will appear every time.
- macOS - Browsers will block Jupyter until you install and trust the provided certificate in Keychain Access. Without it, you won’t be able to connect.
3. Pick a Template & Find a Machine
- Browse Templates for pre-built setups (e.g., PyTorch, TensorFlow, ComfyUI) or create custom templates.
- Go to Search and filter by GPU type, count, RAM, CPU, network speed, and price. Learn about search filters and instance types.
- Disk Space is Permanent. The disk size you choose when creating an instance cannot be changed later. If you run out of space, you’ll need to create a new instance with a larger disk. Learn about storage types and volumes. Tip: Allocate a bit more than you think you need to avoid interruptions.
- Click Rent when you find a match. Consider reserved instances for 50% savings on long-term projects.
- Wait for the instance to start-cached images launch quickly, fresh pulls may take 10-60 minutes. Check instance status for progress.
- Click Open button to access your instance via your chosen connection method.
4. Manage or End Your Instance
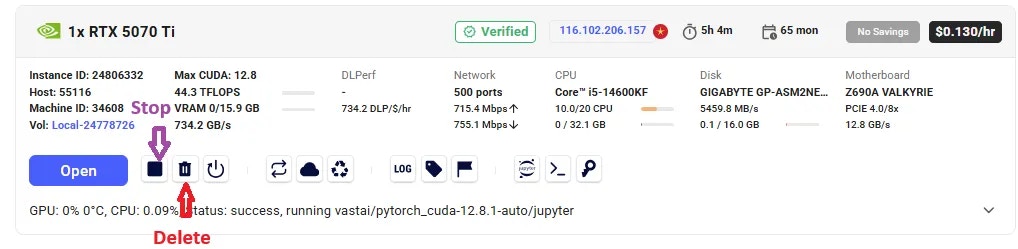
- Use Stop to pause GPU billing (storage still accrues charges). Learn about the instance lifecycle.
- Use Delete when finished to stop all charges. See data movement if you need to save data first.
Common Questions
What is a minimum deposit amount?
The minimum deposit amount on Vast.ai is $5.What happens when my balance runs out? Can I avoid interruptions?
When your balance reaches zero, your running instances will automatically stop. To avoid this, you can enable autobilling on the Billing page. Set an auto-charge threshold higher than your average daily spend, so your card is automatically charged when your balance falls below that amount. We also recommend setting a low-balance email alert at a slightly lower threshold to notify you if the auto-charge fails for any reason. Learn more about billing management and cost optimization.How can I customize a template?
You can create a new template from scratch, or you can edit an existing template. You can find a guide here. See also template settings and advanced setup for more customization options. Learn about managing templates for organizing your template library.Next Steps
Instances Overview
Complete guide to GPU instances, types, and management
Instance Pricing
Marketplace pricing, instance types, and saving strategies
Templates Introduction
Pre-built environments, customization, and Docker setup